In this article, we will be showing you how to take over users’ computers, giving access to others to take over your computer, and enabling remote access.
How to Enable Remote Support
Sign in to the Zoom web portal.In the navigation menu, click Settings.Click the Meeting tab.Verify that Remote Control is enabled.If the Remote Control is disabled, click the toggle to enable it.
How it Works
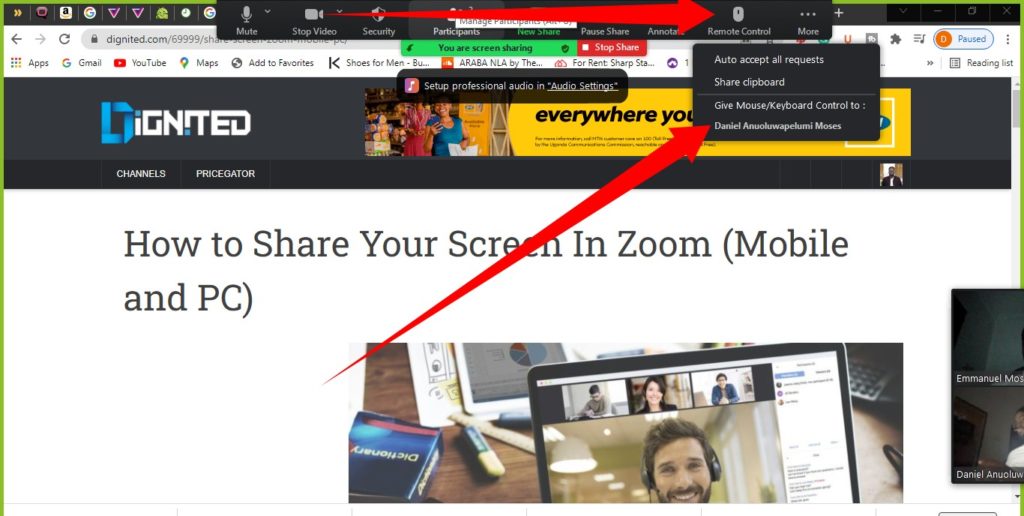
Step 1: Once you have that setting enabled and you want to give someone remote access to your computer, you will first need to share your screen. If you’re not familiar with screensharing on Zoom, here is a quick guide to help you through the process. Step 2: Now, you need to select the part of your computer you intend to give access to. There’s the option to share just one program or share your entire screen. Sharing your entire screen give the other user remote access to your entire desktop including other programs, files, etc. Step 3: To grant remote control access, hover your mouse at the top of the screen sharing window to bring up the menu. Then, select Remote Control from the options. Step 4: When you select Remote Control, you should see a list of meeting participants. Select the participant you intend to give control of your screen to. They will immediatley get a notification letting them know they have access.
What You Need
In conclusion, you should remember that only a users sharing their screen can give access to other users to remotely control their computer. Also, here are the prerequisites needed to use the Zoom Remote Support feature:
Zoom Desktop ClientWindows: 5.4.3 or highermacOS: 5.4.3 or higherLinux: 5.4.5 or higherAvailable to Free or Paid accountsRemote support feature enabled on the meeting host’s account