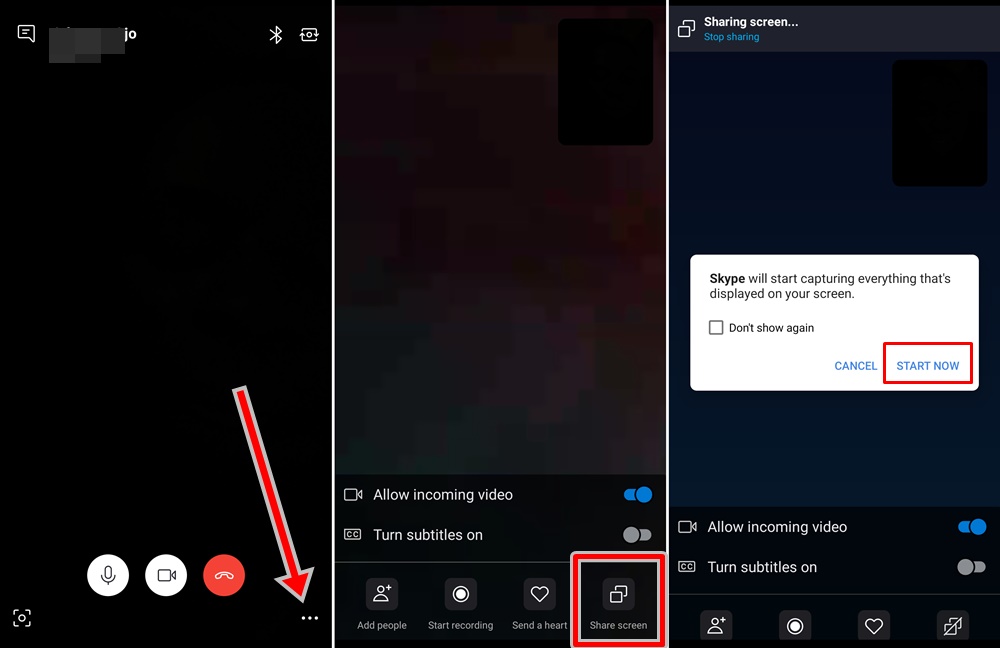
Before you go on, ensure you have the latest version of the Skype app installed on your device. Visit the Google Play Store (for Android) or App Store (for iOS) to install the Skype app or update to the latest version. 1.. Launch the Skype app on your smartphone 2. Initiate an audio or video call with any of your chats or contacts 3. When the person picks up the call, tap the three-dotted menu button at the bottom-right corner of the call window. 4. Tap the “Screen Share” icon 5. A pop-up will appear on your screen warning you that “Skype will capture everything that’s displayed on your screen”. Tap “Start Now” to proceed to share your screen. 6. Your display will now be shared the person on the other end of the call. You can then proceed to minimize Skype and open some other apps or content you want the recipient to see. Be careful not to open documents, files, or apps with sensitive information e.g. you banking apps, finance apps, etc. 7. You can easily stop sharing your screen by tapping the “Stop sharing” button at the top of the call window. You can share your screen both on audio and video calls and the recipients will be able to see your screen irrespective of the device they’re using (PC, tablet or smartphone). During my test, however, the visual quality of the screen being shared was a bit blurry and low-quality. Quality aside, the screen share feature is a super invaluable one. It joins other cool features like secure end-to-end private conversations, live captions & subtitles as well as background blur. Ever used the screen share feature during an audio or video Skype call? How was the display quality of the projected/shared screen?

