Using this method saves you all the hustles of having to reinstall the operating system, and in the process, you’re far more likely to lose all your data. You will also have to reinstall all your programs and drivers, and if you’ve ever gone through the pain of doing this, you understand why anyone would want to avoid that way of going about all this.
Moving Windows 10 to an SSD without Reinstalling
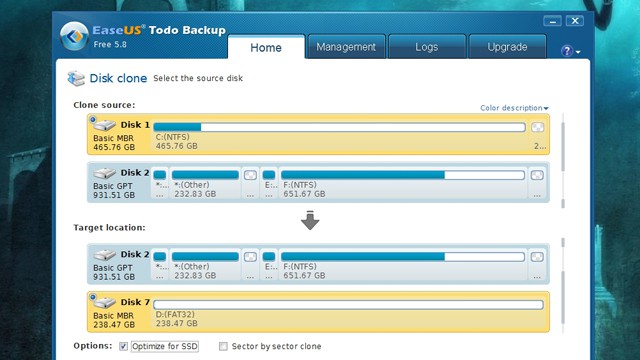
In this post, we shall be using one program; EaseUS ToDo Backup. This is a paid program that has tons of features, but for one-time use scenarios, the Free Trial has all the functionality we need to perform this task.
You first need to download EaseUS ToDo Backup from their official website, Install it and follow the following simple steps.
If the move is completed without any errors (the only possible error that could appear is the message which tells you that your drive is too big, in that case, just delete more files from your HDD), your system is moved to the SSD, and all you need to do is to get rid of the HDD partition with Windows 10 on it.
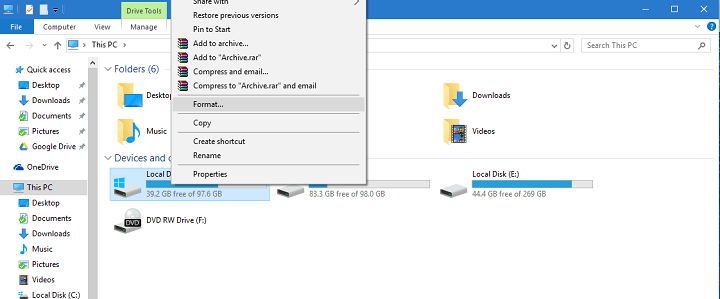
To wipe your original drive, do the following:
And that’s about that, your Windows 10 is now successfully moved to the SSD drive, and it will perform a lot faster from now on.
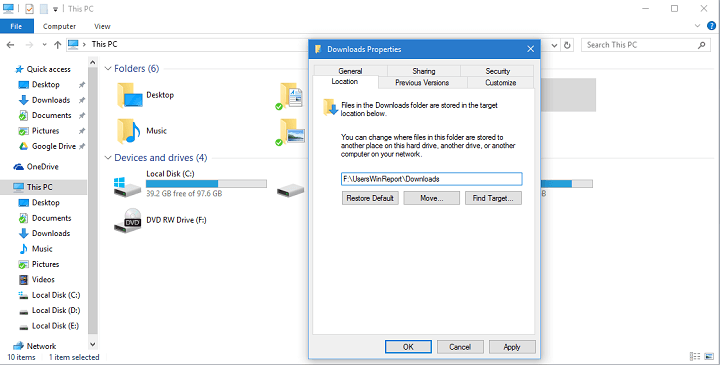
But, we have one more thing to do, we must restore your personal files and user folders. Since you probably don’t have enough space on your SSD, we’ll have to restore your files to the old, formatted HDD drive. To move your personal files and user folders without causing any system errors, follow further instructions.
First, go to your old drive (which is now completely empty), and create a new folder to store all your user folders and personal files. Name it whatever you want (we used WinReport). Now, go to C:Users