The trash folder (Chromebook recycle bin) can be activated using Chrome OS flags but you must have Chrome OS 89 or later. In this article, I will show you how this is done — so you have another chance when you make mistakes.
How to enable the Trash folder
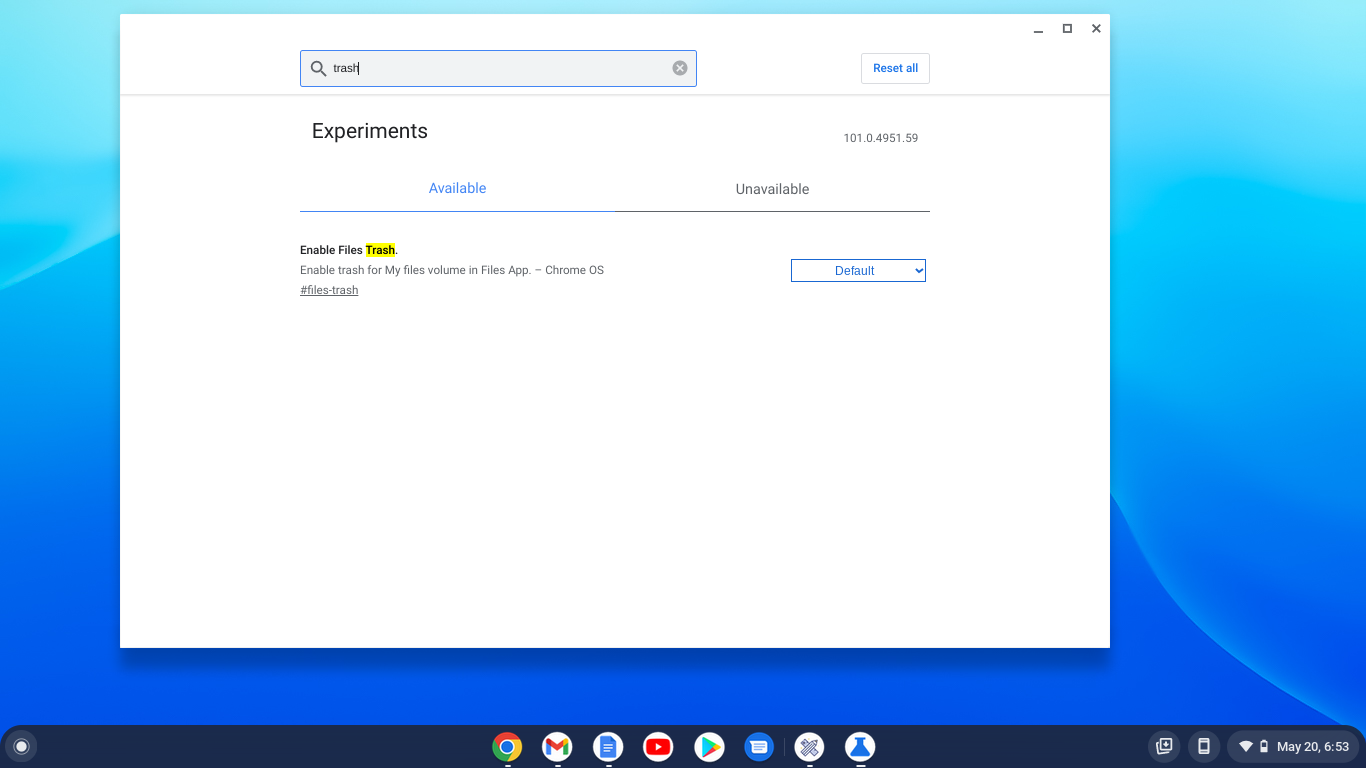
Open the Chrome browser and type chrome://flags in the address bar.In the resulting tab, type trash in the search bar.You will see Enable Files Trash listed there.
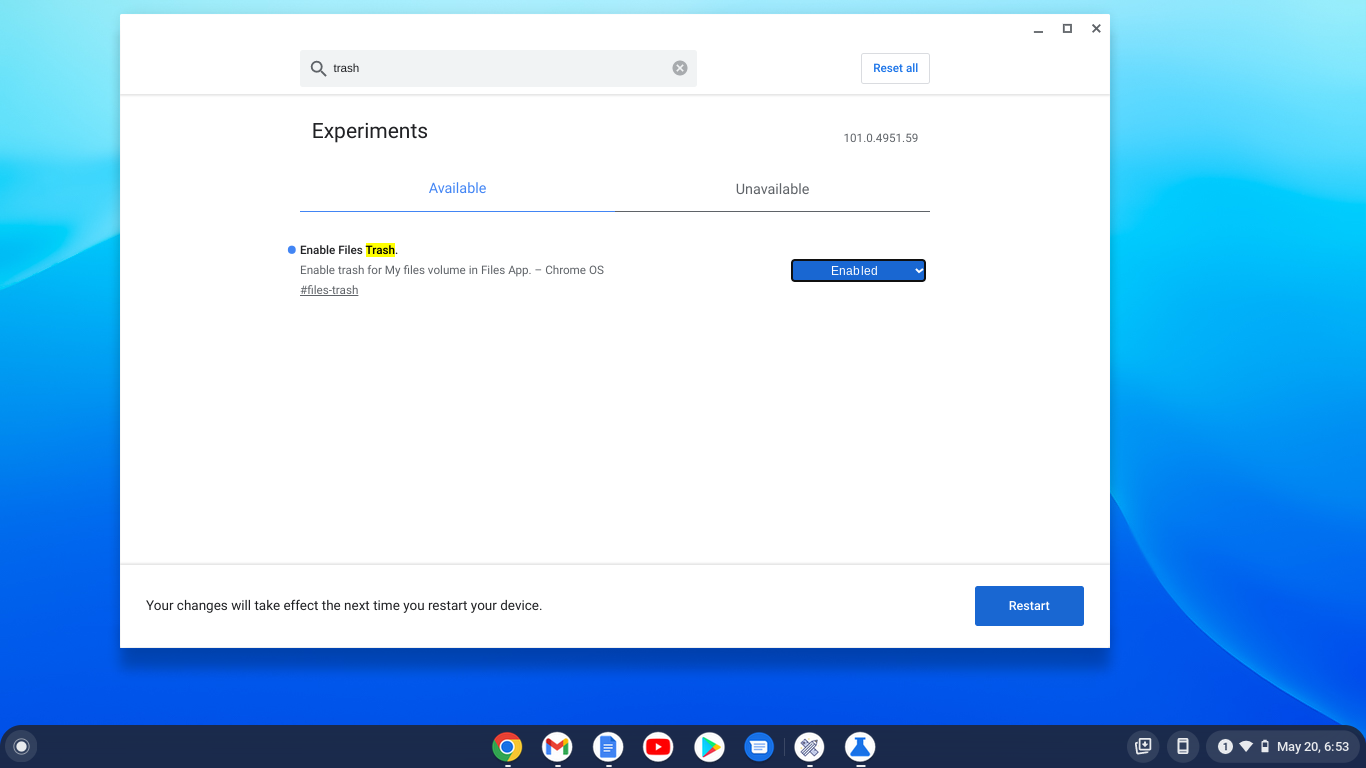
Change from Default to Enabled from the drop-down menu.
Click restart to activate the changes.
Related articles:
What Is the Everything Button on a Chromebook?How to find your Chromebook Mac and IP addressWhat Is Tote and How Does It Work on Your Chromebook?
How to access the trash folder
After restarting your Chromebook, open the Files app. You will see a Trash icon in the left sidebar.
Going forward, you will be able to choose between Delete and Move to Trash when you right-click to delete a file.
If you choose to Move to Trash, the file or folder will be moved to the Trash folder, where it will remain for 30 days and then deleted forever if not restored during that period.
How to restore a file from the Chromebook recycle bin
On the left sidebar of the Files app, open the Trash folderClick with 2 fingers to right-click on the file you want to restore.Select Restore from Trash. If you want to permanently delete the file, select Delete.
That’s it. Say bye to permanently deleting files by mistake and welcome a second chance, the trash folder. I would advise that if you are sure you want to permanently delete a file, go ahead and delete it. Let the trash folder be a place to hold files you aren’t sure whether you want deleted or kept.


